5 Steps to Tie Dye Filament for Colored 3D Prints
For this tutorial – we have our new Community Manager, Zach Frew (a.k.a Frew) walking us through how to dye your nylon filament to print in multi-colors!
When you’re a Maker, you have to learn all sorts of different skills… like baking! Right?
We’ve decided that Pinshape should incorporate some baking into our 3D printing (and we don’t mean printing cookie cutters!) so for this tutorial we’ll be baking… nylon filament. This will turn your clear filament into tie dye filament! This works exceptionally well for making watertight vases because the bond between layers of nylon is stronger than those of other plastics. For this recipe, you’ll need the following:
- Nylon filament (we’ll be using Taulman’s Nylon Bridge)
- Fabric dye (we’ll be using Rit Dye)
- Plastic bags or a pot or large bowl that you don’t particularly care about
- Zip ties or string

Step 1: To get started, you’ll want to take your nylon and make it into circular coils. I find it easiest to wrap the nylon around something cylindrical and then tie it off with zip ties. You can make these coils as large or small as you want or you can refrain from coiling them at all and instead dye a tangled mess of filament to produce some interesting results.

Step 2: Bring some water to a boil. While you’re waiting for the water to boil, choose a color of dye to put in your bag or bowl. Mix the boiling water with the dye, making sure to remove any lumps from the batter so that you end up with a smooth mixture (we’re really pushing these baking puns).
Step 3: Now, you’re ready to add the nylon! Carefully place your nylon coil into the water to your desired height (don’t worry, it won’t melt) and let it soak for 30 minutes. Remove the nylon and rinse it in warm water, then cold water, until the excess dye is removed. Rotate the coil and repeat for as many sections as you’d like to achieve a tie-dye effect!
For this tutorial, I’ll make lots of coils in lots of different colors.

Step 4: Now that our nylon is dyed, it’s time to bake! For Taulman’s nylon bridge, heat the oven to 300 degrees Fahrenheit (149 Celsius), though this may vary based on your specific material. Remove your zip ties or string from the coils and place them on a cookie sheet to bake for four hours!
The reason nylon works so well for tie-dye is because it absorbs moisture readily but we’re going to want to remove this excess moisture prior to printing which is why we’re baking it in the oven.

Step 5: Remove your nylon and let it cool for a few minutes. We’re ready to print! Follow the instructions for your specific filament and get printing. Hint: for larger coils, it’s helpful to wind the coil onto a spool for easier printing.

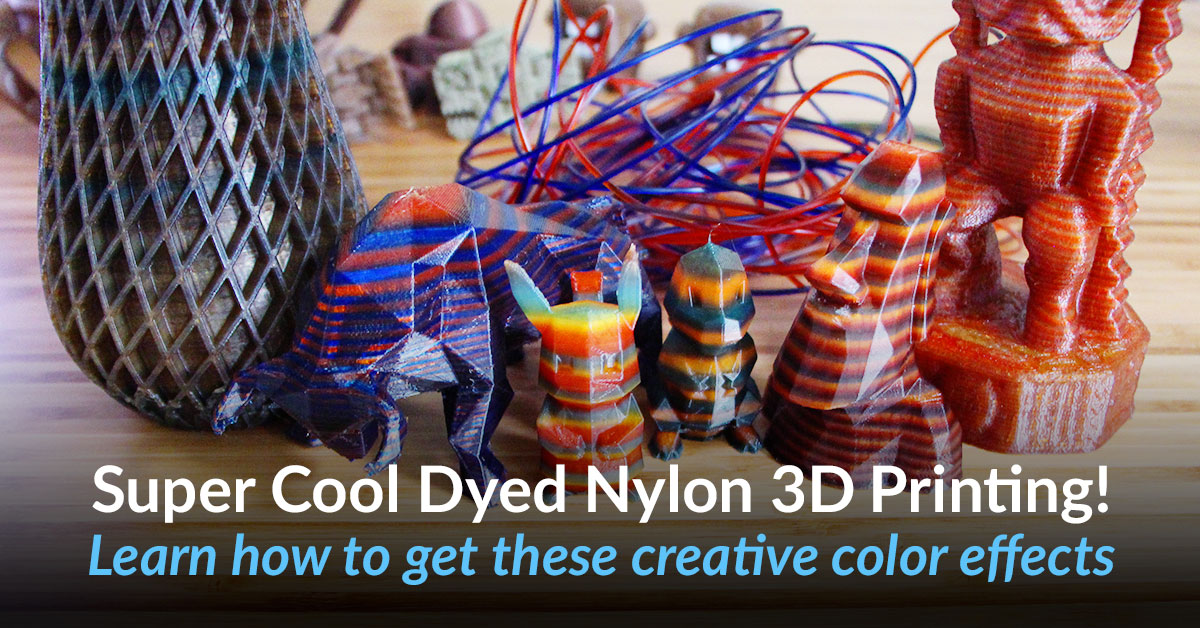
And we’re done! We’d love to see all the wonderful color combinations and patterns you come up with so make sure to upload your prints to Pinshape to show them off!
Here’s a few of the designs we thought would look good with dyed nylon!

Tiki God of Money by richard_swika

Low Poly Pokemon by FLOWALISTIK


