
Design for 3D Printing: Easy Snap-Fit Parts with Maker Club
Our Designer of the Month for February is Maker Club! You may have seen his detailed design for 3d printing guides and blog posts on his 3D printing journal MkrClub.com, or you may know him as the founder of Google Docs/Drive. No matter how you know him, Jonathan Rochelle is here to share a guide with the community on designing snap-together models to optimize your 3D designs. Your next print doesn’t have to have a million supports, and you can get rid of weak spots!
Saving Time (and Sanity) with Snap-together 3D Print Models
I’ve created many models which include multiple parts that snap together after printing. There are several benefits which drive me to do this so often. First, it allows you to print in more than one color since each part can be printed in its own filament color. Second, it provides more opportunity to print complex shapes without compromising printability – that is, without supports and with horizontal strength rather than vertical (z-axis) fragility. Third, it allows me to create objects larger than my print bed, since each part can maximize the print bed and then be snapped together with other large parts.
This approach for me started with multi-color product logos (for keychains), Pegboard tool-holders, kids jewelry and construction toys. I have since applied the methods to things like handles on other models and box lids, where the snap-together fittings are useful. I’ve done most of my modeling so far using Autodesk 123D Design, which I find gives me the right balance of power, precision and simplicity. The printers I use include the LulzBot TAZ4 and the Polar3D.

Almost every snap-together part that I’ve created has some sort of male/tenon side and a female/mortise side which accepts the tenon. I’ll consistently refer to these as the tenon and mortise in the descriptions in this post.
Top 5 Tips for Creating Snap Together 3D Models
1. Experiment with clearance sizes
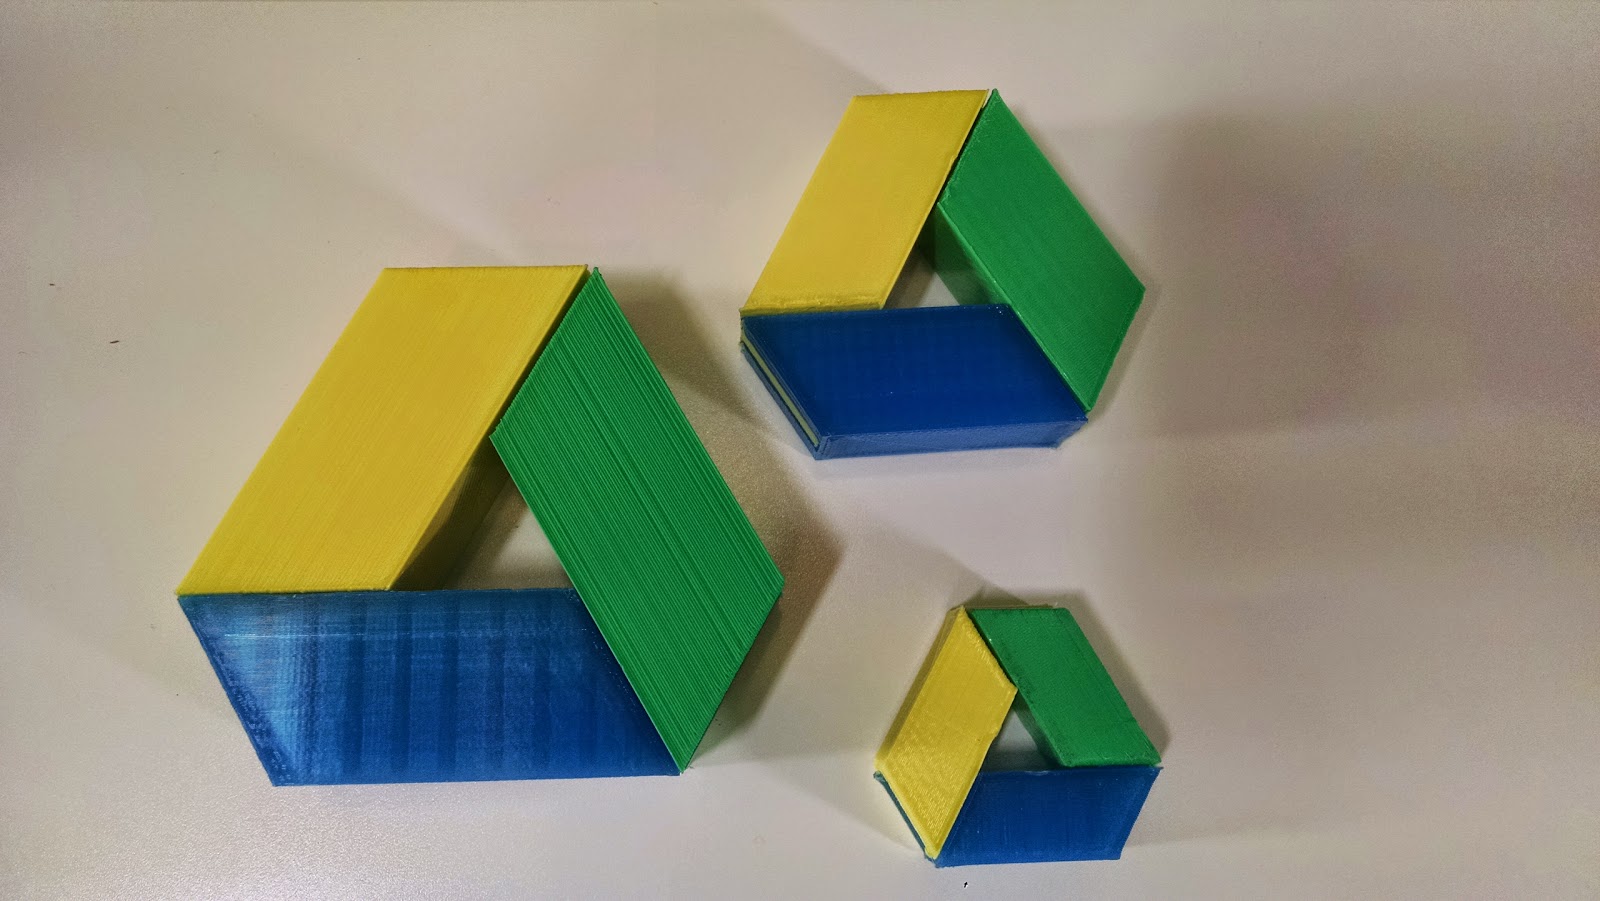
When fitting two parts together, the size of the gap in the mortise can’t be the exact dimensions of the tenon dimensions – there must be some clearance between the two. Even if your printer outputs perfect dimensions, without that clearance, the fitting would be too tight. And, news flash, your printer does not output perfect dimensions. Almost all printers will “ooze” slightly, making mortise dimensions slightly smaller and tenon dimensions slightly wider than expected.
I’ve found that the clearance required on ALL SIDES of the mortise/tenon connection requires a range of approximately 0.2mm – 0.3mm. That depends on the printer, the resolution, the material, speed, and more. Always create a test fitting with some starting point clearance to see how it works. I recommend starting with a mortise which is 0.5mm wider and deeper than the tenon in total – which is a equivalent to a starting clearance of 0.25mm on each side. Once you see how the fitting works, adjust from there.
2. Don’t trust z-layer strength
When creating fittings, try to avoid relying on tenons or mortises which are built up from the print bed vertically. Those parts— with tenons, or even mortise sides— which are built up in the z-layer direction (vertically up from the bed) are much weaker than those built horizontally on the x/y axis. I created a set of pegboard tool holders which required a z-layer connection, and I find those break much more often than connectors which are built along the x or y-axis.
3. Test print isolated connecting parts (vs. entire model)
Whenever I design a model which includes a pair or group of connecting parts, I try to test the connection without printing the whole model – particularly when the complete model is large. I’m not a fan of waiting for a 5 hour print only to find the connection doesn’t work well. The way I deal with this is to “cut up” the model to isolate the connecting parts and print only those sections. This allows me to print a quick test, try the connection, tweak the model, then test again until I get the connection right. Then I make the same adjustments to the larger model and print the whole thing. This has been a lifesaver… or, more accurately and less-dramatically, a time and PLA-saver 😉
4. Know your goals for rigidity or looseness of connections
I’ve had many reasons to use connecting parts, but sometimes the connection I want requires flexibility and sometimes it requires rigidity and strength above all else. Make sure you know your goals for rigidity of connections before you start modeling, and keep these goals in mind as you design the connections. When designing a multi-link bracelet, for example, I want to have flexibility in the connection to keep the bracelet comfortable to wear. When designing a large model which requires multiple parts simply to achieve larger sized final prints, you probably want a rigid connection.
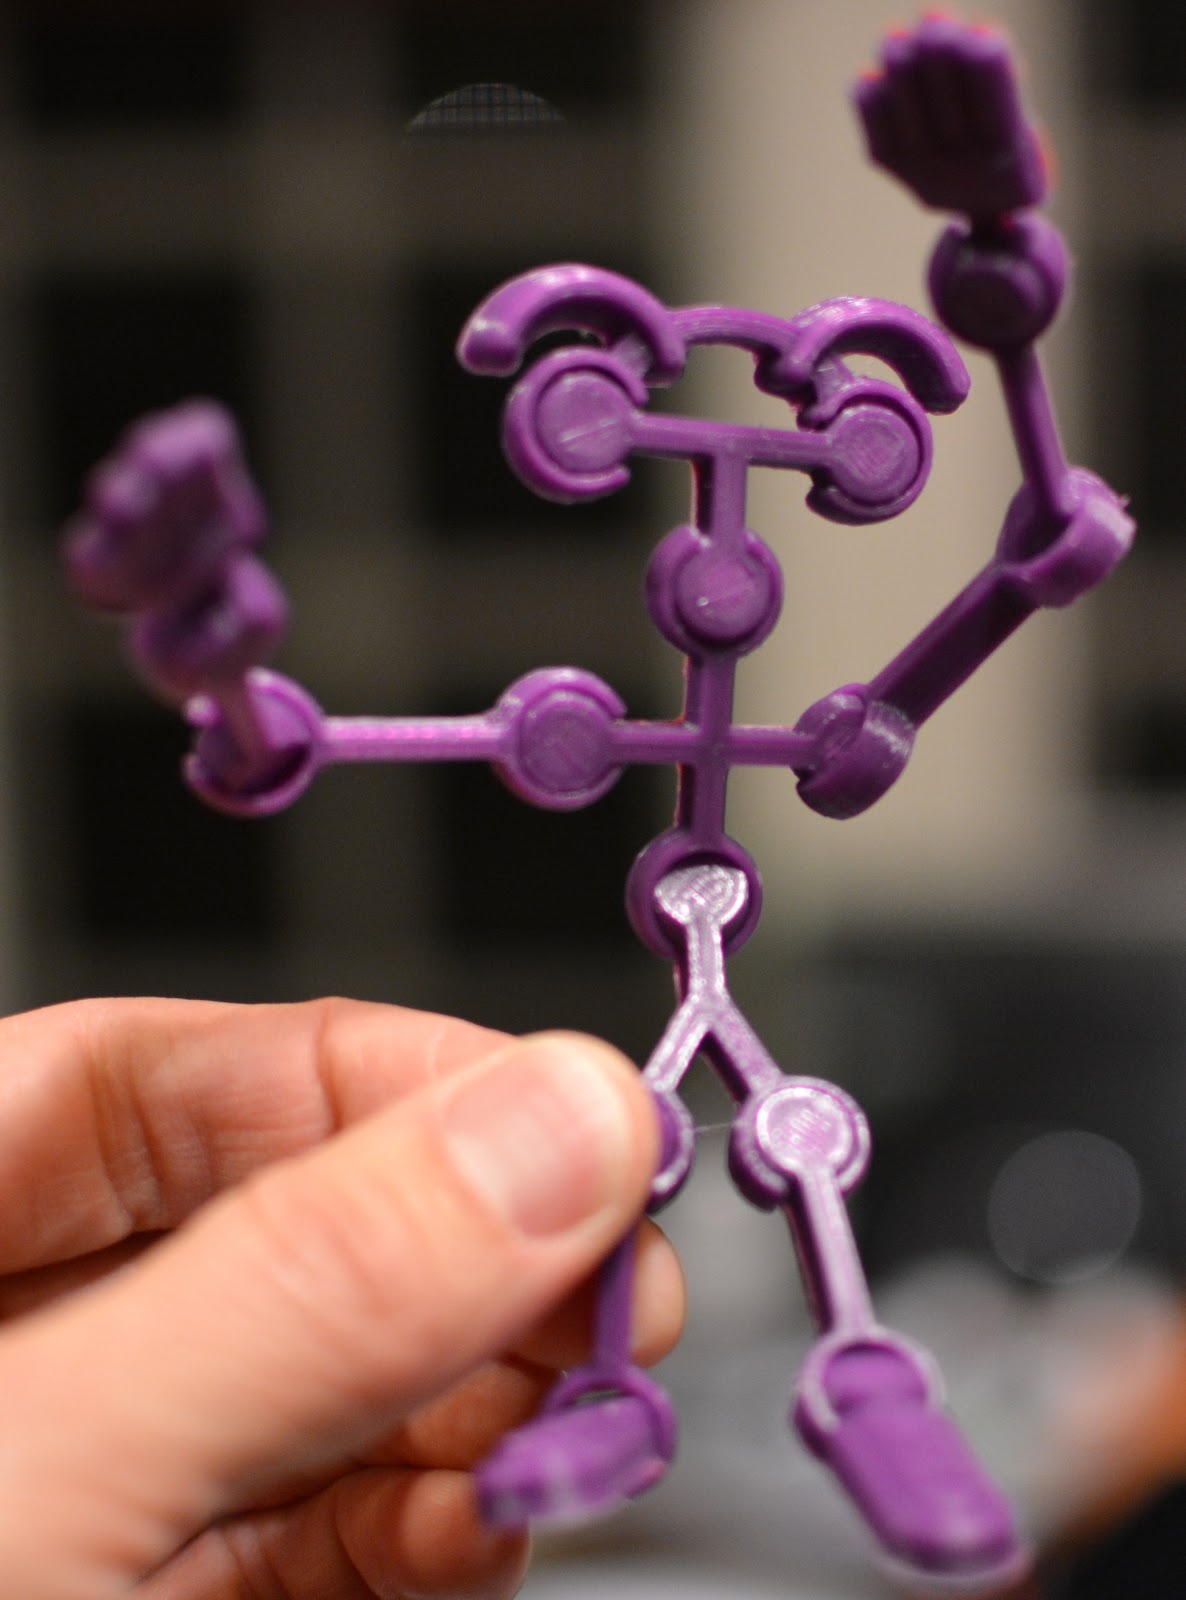
One interesting example that required a balance between loose and rigid is my 3D Bot Bits model. These were intended to be like a toy for kids to create snap-together robot-like characters. I wanted the characters that kids built with these to have enough flexibility to allow changed poses, but enough rigidity to hold each pose. This balance required not only a lot of testing, but I also found that it required a thin mortise wall to give it persistent flexibility to “grab” the tenon (which was round in this model, to create a human-like joint).

5. Watch the scaling
Scaling connecting part models, unfortunately, is not so easy. In many cases, a connecting part which is scaled requires adjustments to the gaps between the mortise and tenon, since the clearances in your original model will scale relative to the rest of the model rather than remaining persistent. In most connecting parts, it is likely that scaling up will require you to reduce the clearances and scaling down will require you to open the clearance up more. Again, the most important thing to do is to re-test your print.
Summary
Overall, I find modeling and printing with connecting parts the most practical way to achieve a functional model. The additional benefits of printing multiple colors and gaining strength by avoiding too much z-layer printing have made snap-together models my most common method of modeling. I’ve been able to achieve strong connections as well as loose connections to meet my needs. Most importantly— and I’m not kidding— I really enjoy the challenge of designing models which are made up of multiple parts 😉
 Jonathan Rochelle— or JR, as most people call him— has been a 3D Printing enthusiast for only a year, having got his first printer (the Lulzbot TAZ4) back in January of 2015. But he considers himself a maker/creator since he was a little kid. While he loves 3D modeling and printing and shares all his projects on MkrClub.com, his full-time job is a product manager for Google in the NYC office. He is one of the original founders of Google Docs and Drive and is now responsible for the Google Apps for Education products. You can follow him on twitter as @jrochelle or follow his Maker and 3D Printing activities on Twitter as @MkrClub.


