3 Most Common 3D Printer Errors and Their Fixes
Features like Formlabs’ one-click print exist for professional machines, but hobbyist printers often require a bit more tweaking and troubleshooting. In this post, you’ll learn about the most common problems you’re bound to run into as a maker and discover their fixes.
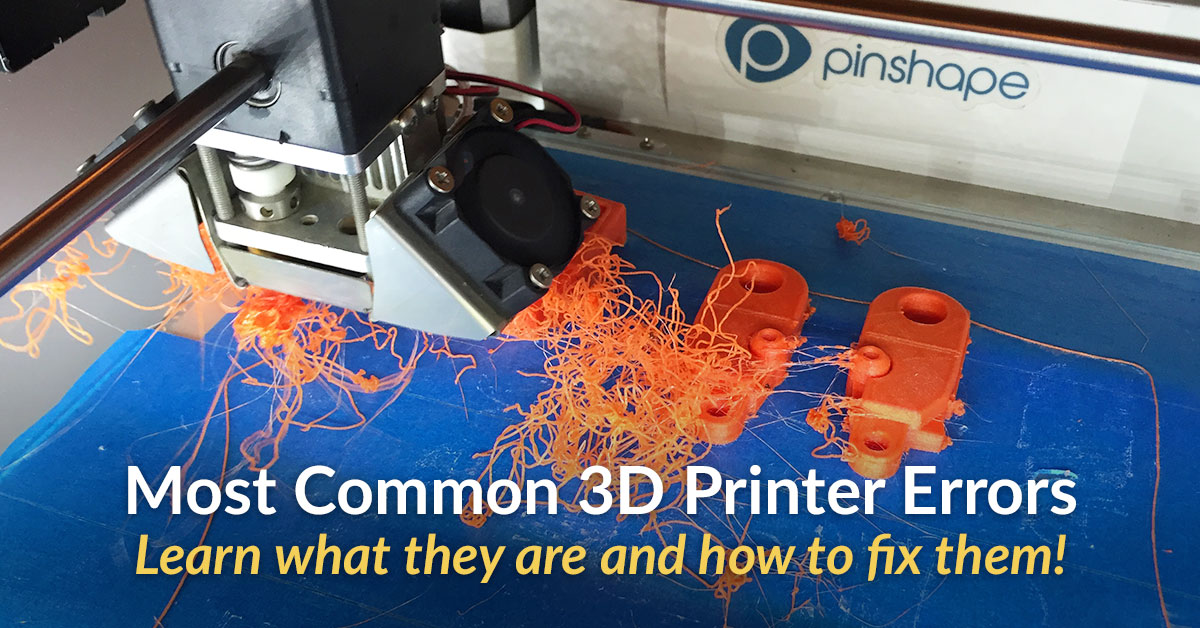
1) Stringing/Oozing
When traveling across empty space, the nozzle will sometimes ooze filament that then sticks to the surfaces of your print. This is referred to as stringing, and appears as thin cobwebs between your print that can be a pain to remove.

Use Retraction:
Adjusting your retraction values is the best thing you can do to combat stringing in 3D prints. When your nozzle is crossing empty space, the extruder will ‘retract’ and pull filament back up through the hotend to keep it from oozing. When done correctly, this is effective at eliminating stringing.
The main variables to keep in mind when considering retraction are speed and distance. Speed defines how quickly the extruder pulls filament back up through the hotend, and distance defines how far the filament travels.
When speed is too low, blobs can form on the surfaces of your print, or stringing can occur between surfaces. Retraction that’s too high may jam the nozzle or create regions where filament isn’t deposited.

A distance that’s too high will cause blobs in your print and lead to filament jams. A distance that’s too low will fail to prevent strings from covering your prints.
Dialing in the retraction distance and speed values in your slicer is the best thing that can be done to combat stringing. Some slicers also include special ‘coast’ and ‘wipe’ parameters. These can be powerful tools to further dial in your retraction values, and consult your specific slicer to see how they’re used.
To determine your optimal retraction values, first consider whether you’re using a bowden or direct drive extruder. Direct drive extruders will typically require a lower retraction distance than bowden extruders. Next, identify which filament you’re using as different materials require different retraction settings.
Materials like PLA and ABS tend to work well with a speed of 40mm/s – 60mm/s and a distance of 0.5mm to 1mm on direct drive setups. Bowden setups typically benefit from speeds in the range of 30mm/s – 50mm/s and distances around 2mm. More exotic materials like TPU often require slower retraction speeds and greater retraction distances.
Adjust travel speed for non-print moves:
The faster your nozzle travels across empty spaces, the less time there is for filament to ooze out of the nozzle. Most slicers have a variable named ‘travel speed for non-print moves’ which can be modified to adjust the speed at which your nozzle travels across empty spaces. MatterHackers did a great experiment adjusting values like retraction distance, retraction speed, and travel speed, and you can find those results here. Their experiment found that 150mm/s was an ideal travel speed for many machines.
Adjust your nozzle temperature:
If you’re still noticing stringing after modifying each of these values, chances are your filament is being heated to too high a temperature. Heat will decrease the viscosity of molten filament and make it more prone to stringing, so if all else fails adjust your extrusion temperature. Note, this tends to decrease the strength of your print, so extrusion temperature shouldn’t be reduced below the manufacturer’s minimum specifications.
2) Print not sticking to the bed
Many of us have experienced returning to our printers only to find that the part has detached from the bed and created either an amorphous blob or the plastic spaghetti pictured below. For a deep dive on treatments to improve your bed adhesion, check out this tutorial. We’ll be going through some general tips here.

The first layer of your print is the most important factor when it comes to bed adhesion. A secure first layer will improve the chances of a successful print.
Level your bed:
Bed leveling is one of the more challenging printer calibration steps but one of the most important for a secure first layer. An un-level bed will cause some parts of your print to be less compressed than others and likely lead to warping later in the print.
Adjust your Z-offset:
On most 3D printers, the Z axis is your vertical axis and that which defines how much space there is between the bed and nozzle. For the first layer of a print, you want the nozzle to be offset between 0.10mm and 0.25mm from the bed. This will ensure that the first layer is slightly squished against the bed without causing poor extrusion from over-compression.
An offset that’s too high will reduce the contact area between the first layer of the print and bed, which can lead to the part detaching. A value that’s too low will keep the nozzle from extruding plastic and can lead to motor skipping.
Adjust your bed temperature:
Plastics contract when they cool, and this leads to an effect known as warping. When plastics contract, they tend to pull inwards which curls the edges of a print upwards and can lead to your print detaching. A heated bed keeps the temperature of your base layers high, and prevents them from contracting inwards. If you’re noticing the edges of your print curling up, try increasing the bed temperature.
3) Plastic Overheating
Plastic that’s extruded at too high a temperature will often yield inaccurate and muddled features. This issue is most common for layers that have a small cross-section.

Layers with small cross-sections print quickly which can lead to them gradually heating. This creates layers that become soft and deform when continuously printed upon. Models like the Eiffel Tower illustrate this effect towards the top of the tower. As the size of each layer decreases, the hotend spends time in the same region which leads to layers heating and eventually deforming.
Layer Cooling:
The best way to combat this is to have a fan dedicated to cooling the layers of your print. This fan should be pointed such that it doesn’t cool the heater block of your hotend but does cool molten plastic as soon as it’s deposited by the hotend. Many machines make use of two fans for the purpose of layer cooling alone.
Slow down your print speed:
Decreasing print speed can help with some parts by providing time for layers to cool before additional plastic is deposited atop them. Note, for some geometries this may worsen the deformation by providing the nozzle with more time to heat the layers of a print.
Decrease your printing temperature:
If all else fails, consider reducing your extrusion temperature. This should be used as a last resort as it tend to be only marginally effective at reducing deformation, and will reduce the strength of your print.
Hobbyist machines are continuing to improve in terms of reliability, but most FDM printers still aren’t suited for easy and reliable printing. If your application or business requires reliable printing and easy setup, consider checking out SLA printers like the Formlabs Form 2.
![]()


