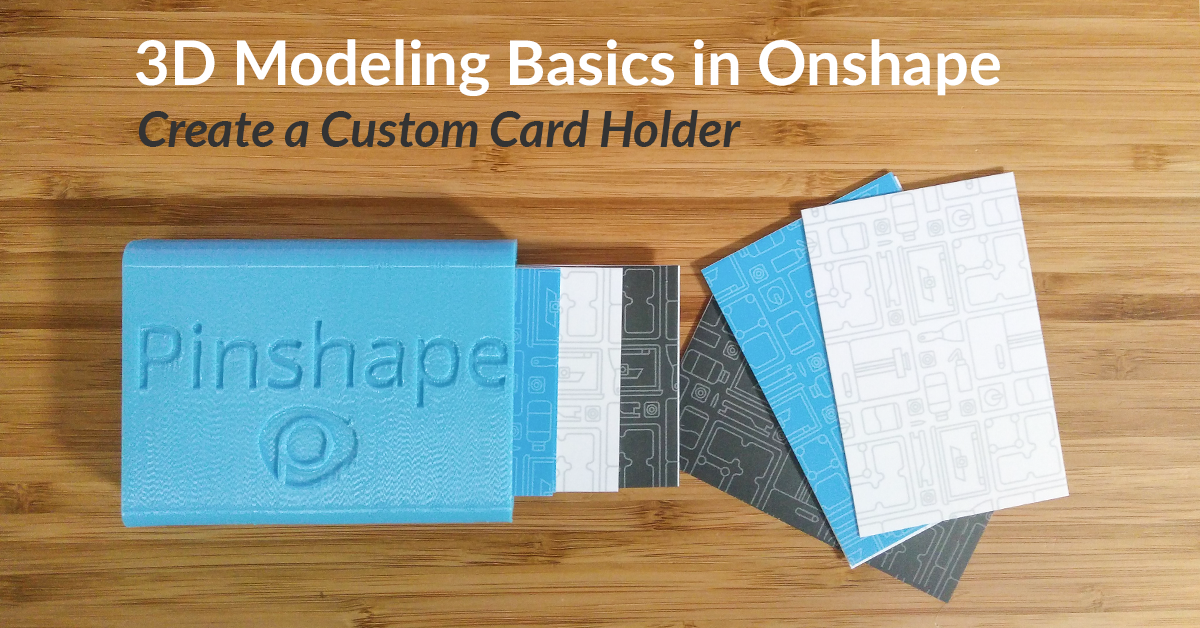
3D Modeling Basics in Onshape – Create a Custom Card Holder
Today we’re going to do an introductory tutorial on 3D modelling your own customized business card cases. We’re using Onshape which is a powerful 3D modeling platform that’s free for individual use. It lives in your browser so you don’t need to download or install it to get started.
In this tutorial, we’ll go over some of the main techniques in 3D modelling and by the end, you’ll have your own custom business card case that is 3D printable! Once you’re in Onshape, select create to get started. Before we start 3D modeling, we need to adjust our workspace units to mm. To do this, select the three horizontal bars in the top left corner and click on workspace units and set this to mm.
1. Creating your sketch
Most 3D objects start with a simple 2D sketch, so select sketch from the top menu and click on your top plane. We’re going to start out with a simple rectangle so select the rectangle tool from your top menu and drag one onto your plane. Now we need to dimension our rectangle. Most business cards have a width of 50mm so we’re going to dimension the long side of our rectangle to be 52mm to give us a little bit of extra space. You can change the height of your rectangle based on how many business cards you want to fit but we’re going to use 8mm. A good rule of thumb is to measure the width of your cards and add an extra 2mm of spacing.

2. Creating an outline
Now we’re going to create the outside of our card cases. To do this, simply select all of the edges by holding down the shift key and select the offset feature from the top bar. You’ll see an arrow pop up and you’ll want to drag that outwards. Hit enter once and you’ll be presented with the ability to enter a precise offset; we’ll be using 2mm though you’re free to make it as thick or thin as you’d like. You can get fancy with the shape of this outline, adding things like fillets and curves so long as you don’t intersect with the interior rectangle.

3. Extruding your sketch
Now comes the exciting part; turning your 2D sketch into a 3D model! Hit the green checkmark to save your sketch and select extrude from the top bar. Highlight your outline and enter your extrusion depth. Most business cards have a length of about 90mm so we’re going to be using 88mm so that they’ll stick out a bit and be easy to grab. Hit the checkmark and you’ve created your 3D solid!

4. Enclosing one end
Now we need to enclose the end of our model. Select sketch and choose either of the open faces. Now just trace over your outline with a simple rectangle. If you were a bit fancier and added curved edges, select whatever segments you used. Click the checkmark to save your sketch and extrude! We’ll be using a short 2mm extrusion depth for this but feel free to experiment. Rotate your model using the right mouse button to make sure the extrusion is going away rather than towards the model. Your model is complete! If you want to customize it with your name, move on to step 5. If not, skip to step 6.

5. Adding text (advanced)
To add text, select sketch and choose whichever face you’d like to add text to. Select the text tool and drag out the rectangle (don’t worry about the size of the rectangle right now). Enter your text and hit the checkmark. Chances are, your text isn’t sized or oriented properly so we’re going to fix that using something called constraints. First, click show constraints and delete any of the icons that appear. Select the long edge of your text and use shift to select the long edge of the face you’re working on as well. To make them parallel, select the parallel constraint from the top bar. Now select one short side of your text and the corresponding short side of your face. Use the coincident constraint tool for these. Do the same for the other short side of your text and it should conform to the size of your card holder.
Select the checkmark to save your sketch and choose the extrude tool. This time, use the remove feature from the extrude dialog. 1mm should be more than enough to show our text so select your depth and hit the checkmark. Our customized case is complete!

6. Exporting and printing!
To export your model, right click “Part 1” from the bottom left and select export. Use STL as the format and click okay to download your model. It’s time to load your model into your favorite slicing program and get printing. Make sure to upload prints and your customized models to Pinshape!
![]()


