Learn to Create Your Own 3D Printed Penny Board!
Design is an iterative process, just ask Simone Fontana – creator of a fully functional 3D printed penny board. Check out his design and assembly process and what he learned from the earlier versions of his penny board design!
Last summer I was searching around 3D model sites for a challenging project and came across the penny board. A few designers designed penny boards that looked nice aesthetically but weren’t actually functional. I decided I wanted to take up the challenge of creating a penny board that is easy to print and functionally sound.
My main challenges were:
1. How can I make it 3D printable on FDM, preferably without supports?
2. How can I attach the different parts together?
3. How can I make it safe and functional?
4. How can I make it look REALLY cool
Version 1
With those big questions in mind, the first thing I did was order a penny board so I could get a better understanding of the shape and some of the dimensions. I created the first basic shape in rhino and tried to minimize the number of supports that would be needed. This was the result:

After I was happy with the shape, I needed to figure out where to create the four holes to attach the trucks and how to create a nice grip on the board. I used the penny board I purchased to get the measurements for the holes and modelled them onto my own board in Rhino 3D. Fortunately, everything worked perfectly on the first try.
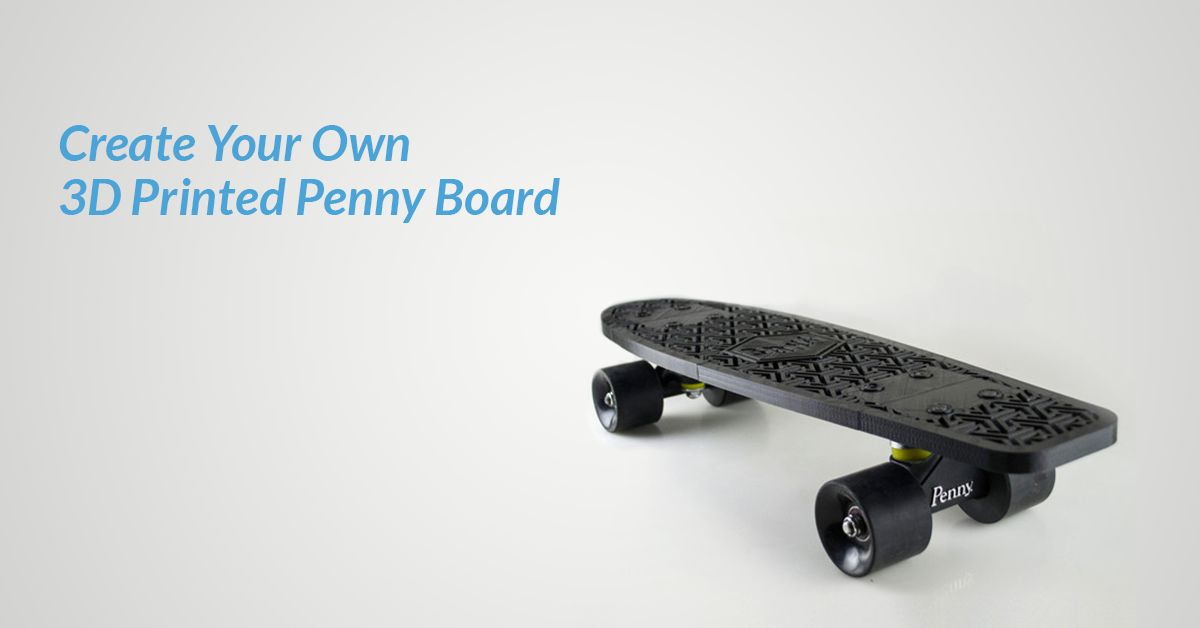
For the grip, I decided on a rhombus pattern and then added the logo from the penny board I had purchased.

Most printers aren’t large enough to print the board in one go so I split it into 4 different pieces. I purchased a steel rod to attach the pieces together and also add stability to the board.
Now, the design was ready to be printed.

I printed all the parts in vertical orientation which was a mistake (I will explain why later). I assembled everything together and it worked! You can see the video here.
![]()
Version 2
I was pretty happy with the first iteration but made a few small mistakes.
The angle on the tail was a little off and broke instantly when I tried to use it. The pins I used to keep the parts together weren’t working perfectly either and because I printed everything vertically, the stress from standing on the board broke apart the layers easily.
The first version was a good start, but it was time to create V2.
At the time, I was collaborating with Ricardo Salomao (@salomaoric on Instagram) and we were releasing the design under the name of 3DNA. A couple of months ago we opened together our company 3DNA Ltd.
The big changes in V2 were as follows:
- Remove the angled tail and make it flat
- Change the pattern
- Eliminate the need for pins everywhere but on the central part
- Change the orientation so it’s not printing vertically
- Change the hold for the steel rod to a triangular shape
For the second version, this was the result:

The feedback was a lot better after this version. I didn’t have a problem with layer separation and the tail was working without an angle. The only real issue I had was the pin for the central part didn’t keep things together very well and after a long ride, it would start to separate.
When I checked all the comments under the video of the first board, a lot of people wanted to know why they should print a board that was so similar to the original. So, I decided to make a V3.
Version 3
For my third I fixed the separation problem and reduced the thickness of the board. This also reduced the time it takes to print, since each part needed 40-50% infill. I wanted to make this the best and coolest version so that people would be convinced to print the board.
To fix the problem of part separation in the center, I decided to change the triangular steel bar in the center to a threaded steel rod so that the board could be held together with bolts on either end. If you’re interested in building your own, I used 2 triangular steel bars with a diameter of 6.4mm and a length of 52cm and an M6 threaded bar with a length of 54cm and two M6 bolts on the end.
After that, I reduced the thickness of the board and created a crazy pattern and this is what it looked like:

At the time, I was collaborating with FormFutura and they provided me with a new material they were releasing the same day as I was releasing my video — TitanX and ApolloX. They are really amazing materials with high strength and high performance which was perfect for my project.
So I printed two boards with the two different material. Here you can see the process and the test of both boards.
I’m really happy with this third version of the board. It prints easily and I personally rode this board for more than a month with no problems. The only thing I’m looking to improve is the current grip pattern, although the current iteration looks awfully neat.
For the next version, I’m hoping to print the entire thing; wheels, truck, bolts, etc. so stay tuned!
Hopefully this will inspire other people to have a go at printing their own penny boards and if you do, tag me on social media @fntsmn as I’m always really happy to see them.

3D Printed Deck Cam Penny board/Skateboard Accessory
Edit: If you already have a penny board or skateboard, check out this tutorial on how to make your own 3D printed deck cam and shoot some sweet video while you ride.
![]()
Author: Simone Fontana
I am an Italian 3D designer currently working in the 3D printing industry with a background in web development. I am passionate about 3D printing and currently a co-founder of 3DNA Ltd, a design studio specializing in 3D printing. I’m driven by creativity and I have a strong knowledge of FDM technology and different machines. My goals are to grow as a designer and increase my knowledge and experience.


