3 Rules to Avoid Support Structures When 3D Printing
You probably know Fantasygraph as the designer behind some of the best support-free designs out there. Whether it’s a character design, or one of his other creative works of art, you may be surprised to know that his designs do not require supports. He’s here to share his story, and give you 3 rules to help you lead a support-free life! Let’s welcome Pinshape’s featured designer for May!
 Since my initiation into role playing games like Dungeons & Dragons (introduced to me by my father in 1978), I have always been into ‘Fantasy Art’. As a Dungeon Master, I have often drawn pictures to illustrate the situations that my players encounter when we played altogether. I was also addicted to computers during that time, so I naturally started drawing on the computer, first in 2D, then in 3D…
I have always liked the beautiful giant figurines in resin that can be found in comic stores that show heroes or Japanese anime characters in all their glory, but these objects are often overpriced. With the arrival of 3D printers, I can now use this new tool to bring my digital graphics into real life!
But there is a catch. Depending of what we want to print, we need supports for some parts of the object so that it is printable on a consumer 3D printer. We can’t just print on thin air.
Trying to remove the support from a 3D printed object is often difficult, and at best, it leaves an ugly, scarred surface at the contact zone. In the worst case scenario, you break the supported part and have to end up resorting to glue.
The main goal of this article is to help you think about your object so it can be printed without supports. Here’s three main tips to help you live a support-free life.
First rule – The Answer to the Ultimate Question of Life, the Universe and…3D printing without supports
If we trust the “Deep Thought” computer from ‘The Hitchhiker’s Guide to the Galaxy‘, the answer is 42. But in fact, it’s 45 (roughly) in the case of 3D printing.
The first rule to printing without support is that the angles in your object need to be under 45 degrees.
Use an overhang test model to check and see if your printer is able to print these angles successfully.
So take this into consideration when making your model. According to the type of filament, the layer thickness, and the size of your extruder nozzle, you can push this to more degrees but it’s at your own risk. It will also depend on the hardware. Pushing the limits can be a problem if you want to distribute your design for others to print on their own standard printers.
Second rule – To print without supports, use supports.
This is a little trick that was used by sculptors throughout history. When you want to support a part of a statue that will otherwise collapse due to its own weight, you can use the background and/or objects to hide the support: 
You can see on this “Venus Victrix” statue by Antonio Canova that the pile of cushions act as a support for the right arm. The folds of the toga are then used to support the underside of the left leg.

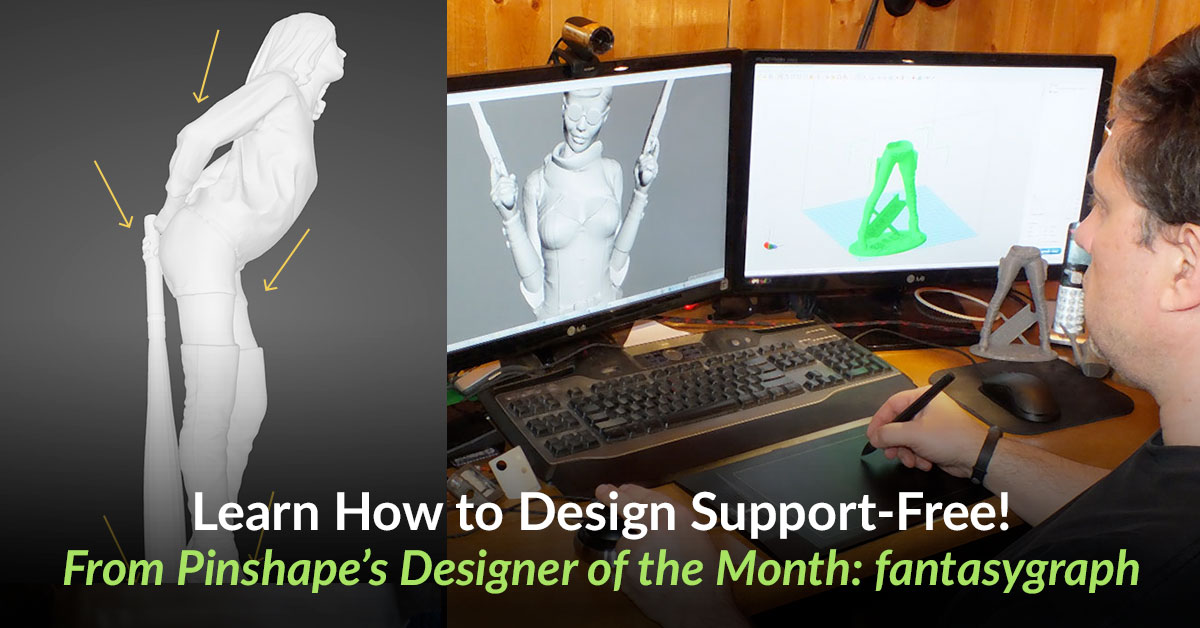
One of my older model, “The Guardian”, is a perfect example of how to hide supports. The long gown hides and supports the legs, so I don’t need to worry about the horizontal right thigh, or the underside of the buttocks/crotch. The spear fixed to the bottom side of the robe is a support for left arm.


You can use some parts of the model’s hair like I did for my “Black Swan”, or an object that will support the chin of a character like the katana of my other model “Machiko”.
The base of the stone wall will support the left foot here. You can see a little cheat: the tip of the boot is not supported but the light slope of this area is enough to make it printable.

Pose your model in a way that allows you to use the background and/or the other objects to act as a support. It’s an art in itself to be able to do that and keep the scene natural-looking.
Third rule – And when there are no other solutions, use supports wisely.
When I make my models, I often use a base for the aesthetic, to fight warping (tip: an oval or round base prevents warping, but not a square one), and to help the adhesion of the model to the bed. I don’t care about the appearance of the underside of the base because we do not see it. Take the example of a character with a horizontal arm pointed to infinity and beyond :

If I print this model “as is”, I will need supports for the whole left arm (body 0 degree, no supports needed; arm 90 degrees, full supports required)

The underside of the arm will be ugly when I will removed the supports.
Now, if I put rotate my whole model to 45 degrees and just put support under the base, the model can be printed without supports except as its base as all the parts of the model fall under the 45 degrees rule. As a result, the supports will be a lot smaller and less filament will be used.

It’s not a big deal if the underside of the base is damaged when we remove the supports: a bit of cleaning and using some fine sandpaper to smoothen the defects will be sufficient to make the model look polished and clean.
My last piece of advice is to check ALL the aspects of your model thoroughly.Turn it around,look under and above, and sometimes you may miss little details that break the first rule (often with organic models like characters.), causing you to curse at the world just thinking about the hours of printing that you’ve just lost.
With these 3 small rules, you can produce a model that will not be harmed by these icky supports. Have fun, and happy printing!
About the Author
 I got into programming and computer graphics in the first decade of computers (TRS-80, followed by the C64 and then later the fantastic Amiga) along with role-playing games. One area fed into the other and vice versa, helping grow both my passions. I later became a professional IT analyst and I emigrated from France to Canada in my 4th decade.
Self taught in 3D modeling, I am greatly inspired by fantasy worlds and their creatures.
I bought a Solidoodle 2 in July 2012, as it was the only assembled, affordable printer that existed during that time. Since then, I’ve tried to give life to all the creatures that I’ve imagined and previously only drawn in 2D. A Solidoodle 4 and a Prusa i3 replaced my too small and aging SD2, which now serves as a laser engraver.
My preferred 3D design software consists of Meshmixer, 3D-Coat and ZBrush. In terms of hardware, I have a basic graphics tablet (Huion H610 Pro) and mouse (3D SpaceNavigator from 3Dconnexion. This works wonderfully in Meshmixer and 3D-Coat).
All my models are available under the CC-BY license International 4.0 (free even for commercial use, given I receive credit. Donations are not prohibited if you want to encourage me!)


